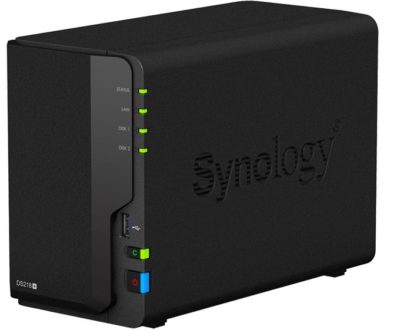
Using a Chromebook with Lights-Out
In this (longer) article I will deal with Google’s Chromebooks. I show you how to use your Chromebook together with Lights-Out to wake up your server when needed and then keep it active. I also show you how to wake up other computers and manage the server or NAS with Lights-Out Mobile.
What exactly is a Chromebook?
In the beginning, Chromebooks were just better web browsers that ran applications like Gmail in their Chrome browser. As a result, there was no way for you as a user to install other applications or interact with the underlying Linux operating system.
To increase the possibilities of use and attractiveness, Google then gradually expanded Chrome-OS. At first, the possibility was added to install and use Android Apps via Google Play. This has suddenly increased the number of high-quality applications. And if you bought an app in Google Play for your Android smartphone, you could usually use the same app on your Chromebook.
Recently, there is also the (beta) possibility to run Linux in a virtual machine and to use desktop programs under Linux. So, you as a Chromebook user have all at once a whole range of high-quality Linux programs such as Gimp available.
Where are the limitations?
Android apps run in a sandbox; Linux apps run in a container in a virtual machine with a different network address range. Google thus prevents Android or Linux apps from directly accessing the local network. As a result, for example, Wake-On-Lan does not works with such apps. Only extensions or PWAs, which are directly integrated in the Chrome browser via JavaScript, have this capability.
What are the requirements to use a Chromebook with Lights-Out?
Those who use Lights-Out on their server or NAS to save energy usually have 2 mandatory requirements and one optional requirement:
- Mandatory request: Wake up the server or the NAS via Wake-On-Lan.
If you use Lights-Out on your server or NAS to save energy, you first want to wake up or start your server or NAS when needed. - Mandatory request: Keep the server or NAS active.
When the server or NAS is ready to use, you want to detect that the Chromebook is using the server or NAS. Lights-Out should detect this activity and keep the server or NAS active. - Desired request: Manage the server.
This includes the ability to shut down or restart the server or the NAS.
Let us now look at these 3 points and possible solutions in detail.
Request 1 – Wake up the server or NAS with Wake-On-Lan
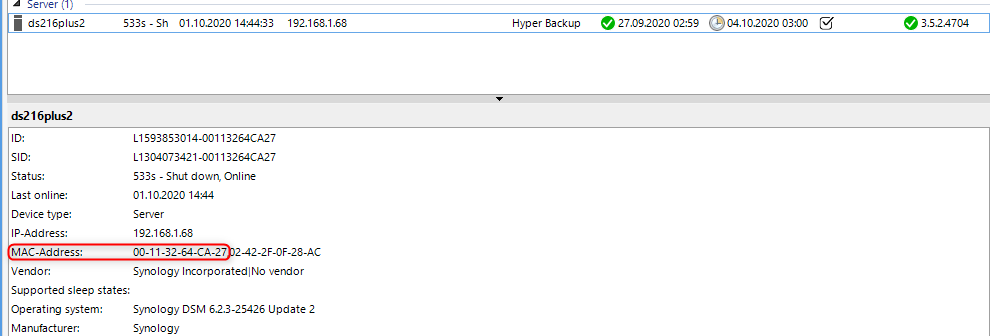
The physical network address (the so-called MAC address) is required to wake up a computer with Wake-On-Lan (Wol). With Lights-Out it is easy to find this out.
Find out the server MAC address
Start the console or dashboard and open the Computer tab. At the bottom you will see your server or NAS. Click on the entry and read the 6-digit MAC address in the detailed view. In the example, this is 00-11-32-64-CA-27.
Find a working Wake-On-Lan App
As described above, the architecture of Chrome-OS (the operating system of Chromebooks) prevents broadcast packets from being sent from Android or Linux apps. Therefore, none of the many Android apps can be used under Chrome-OS!
The only possible solution is the use of a Chrome extension, which is based directly on the Chrome browser. Under this link (works only on your Chromebook) you can find the Wake-On-Lan extension in the Chrome Web Store.
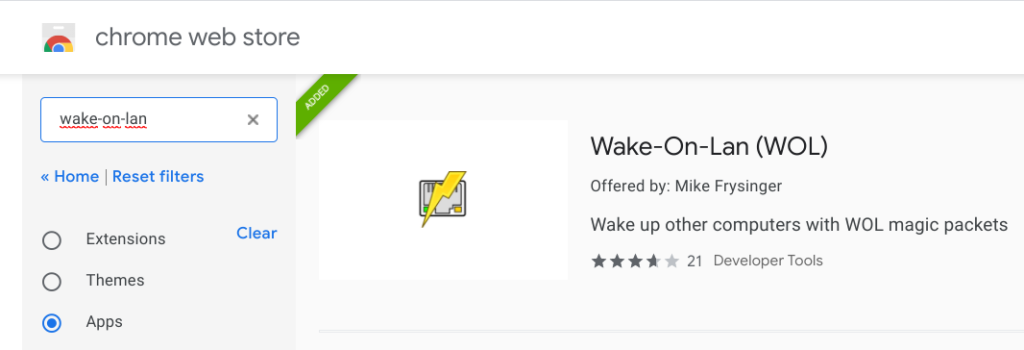
Install this extension in Chrome. After the start you can pin the extension to the start bar. The user interface is, to put it carefully, a bit of an oddity.
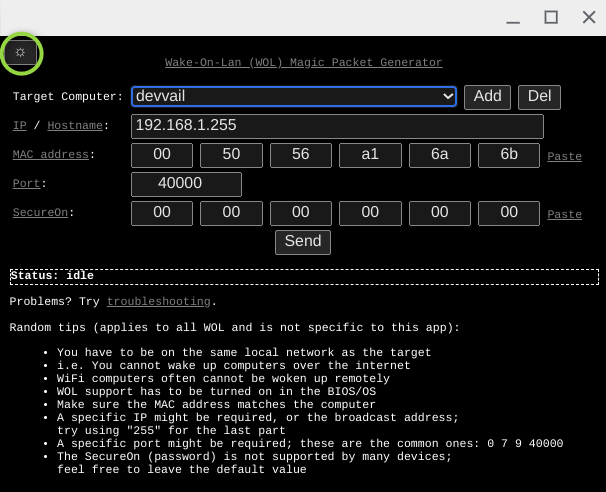
Personally, I find the dark view less legible and have therefore switched to a white background with the gear wheel in the upper left corner.
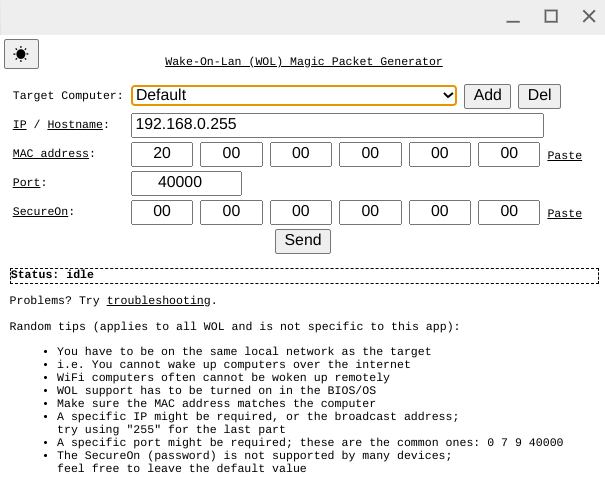
Adding the server to the extension
To add a new server, you must follow these 3 steps in exactly this order:
- click on Add
- then enter the name
- click again (!) on Add
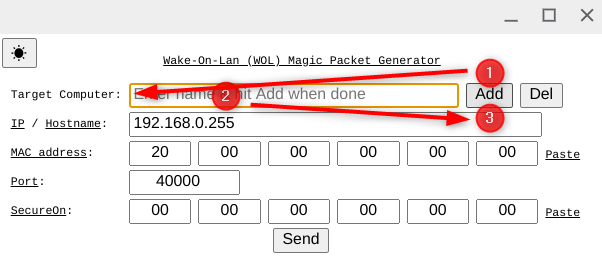
Only then do you fill in the other fields:
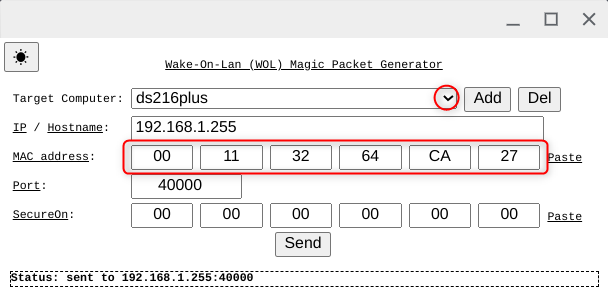
Enter the local broadcast address under “IP / Hostname”. This is normally the IP address of the server (in our example 192.168.1.68). Then replace the last number group with 255, i.e. 192.168.1.255. Finally enter the MAC address in the 6 fields. Done.
A click on Send should now wake up the server or the NAS. To add another computer, follow the 3 steps from the beginning again.
Request 2 – Keep the server or NAS active
There are two solutions for this requirement, a free, built-in solution with Lights-Out and a second inexpensive one based on Lights-Out Mobile.
The free of charge solution for Chromebooks with Lights-Out
The built-in solution is based on monitoring the Chromebook as a network device. For this we first need the IP address of the Chromebook. Open the settings on the Chromebook.

Click on the small arrow under Network to display the known networks.
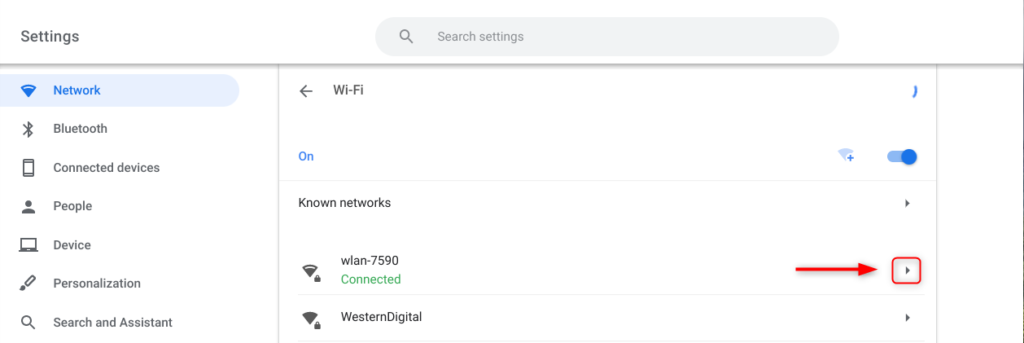
Click on the small arrow again to view details of your network:
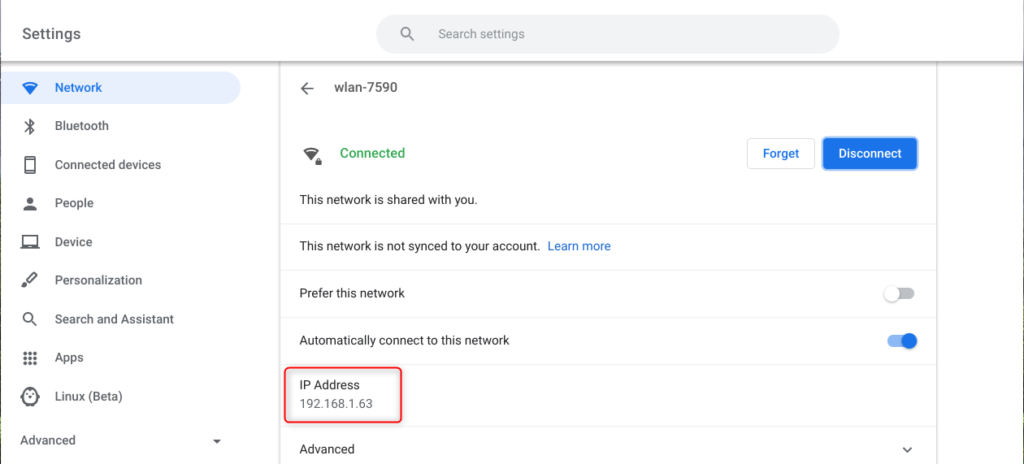
Here you will now find the IP address of the Chromebook, in our case 192.168.1.63. With this knowledge you start the Lights-Out console or dashboard and go to the tab “Network Devices”. Sort the view by IP addresses to find the Chromebook.
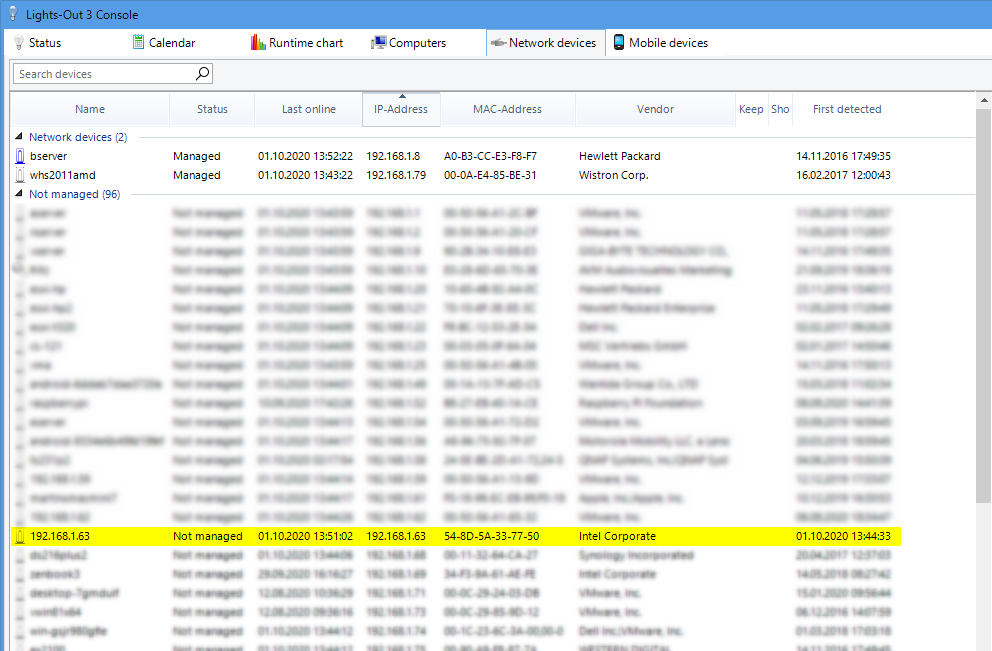
If you have many network devices, it is faster if you simply enter the last part of the IP address (here .63) in the search field:

Right click on the entry and set the Chromebook to managed. This will move the entry up to the managed devices.

Then double-click on the entry to open the properties dialog.
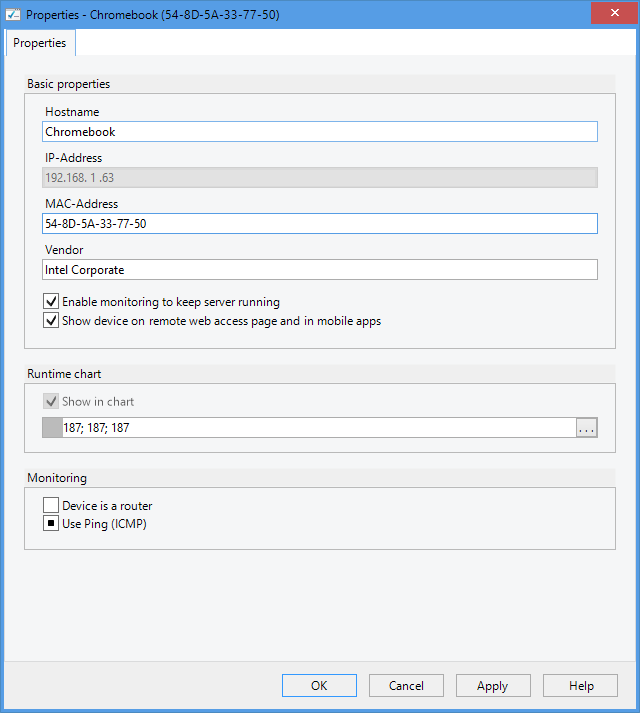
Please replace the name with something expressive, here Chromebook. Then activate the monitoring and assign a suitable color to the runtime diagram. The success of our efforts is now visible. The Chromebook is online and keeps the server active:

The disadvantage of this solution is that the server is kept awake even if the Chromebook is used for other things and the server is not needed at all.
And this leads us to the second solution, based on Lights-Out Mobile. This solution also allows to fulfill requirement 3.
Lights-Out Mobile on Chrome-OS
In Google Play you will find the Android app Lights-Out Mobile.
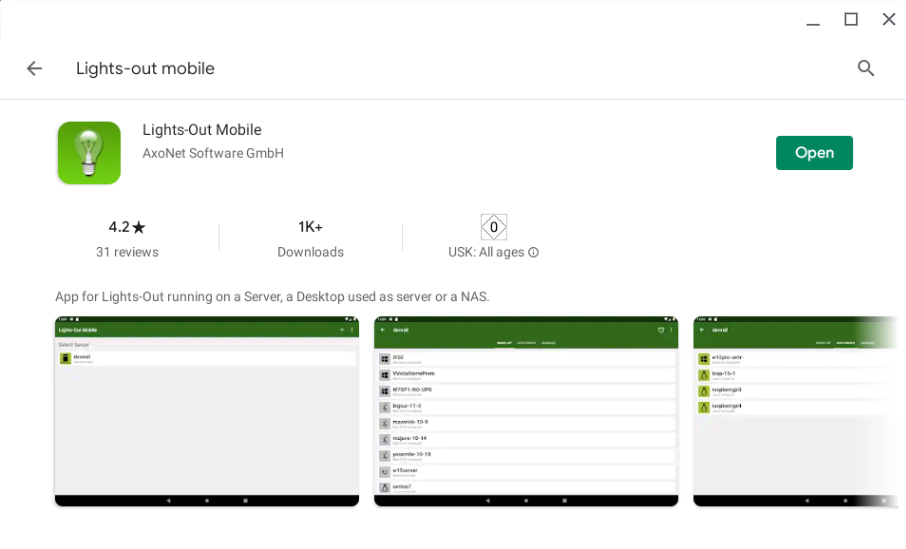
If you are using a Chromebook, chances are that you are already using the Google ecosystem on your smartphone and may have purchased the App Lights-Out Mobile. If not, using Lights-Out Mobile on Chrome-OS might be another argument to buy the app now.
Install Lights-Out Mobile on your Chromebook via Google Play. Store your server in the app. If it does not work with the name, please use the server IP address (which you can read in the console, in the example it was 192.168.1.68). Use an username with administrative rights.
Then set your Chromebook in Lights-Out under “Network Devices” either to unmanaged or remove monitoring. And activate the app in the Mobile Devices tab.
Start the app and move it to one side of the screen, for example.
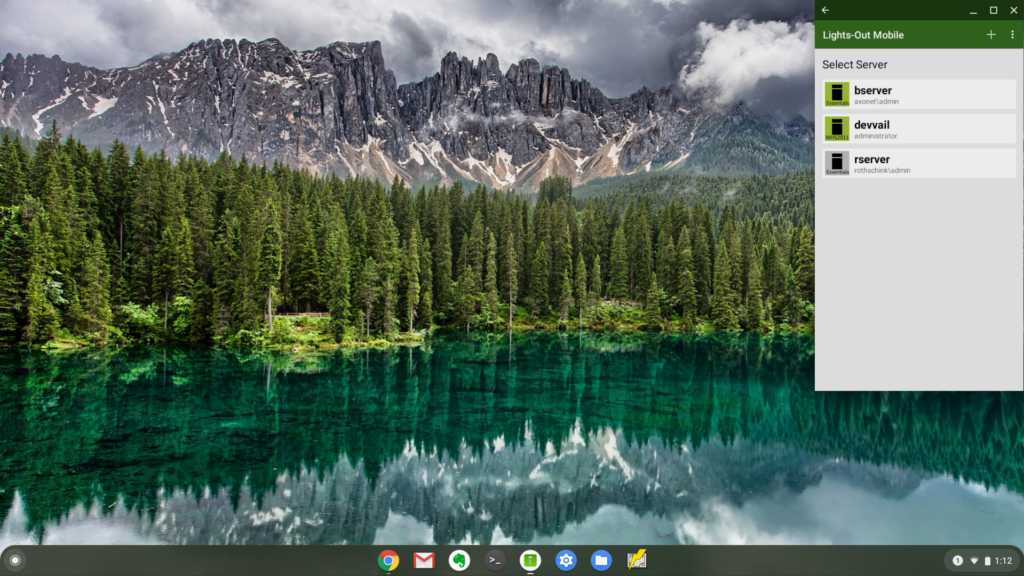
As soon as the server name is clicked on, the app connects to the server and keeps the server awake from that moment on. Unfortunately, the automatic wake-up does not work with Lights-Out Mobile for the reasons mentioned above. Therefore, you still need the Chrome extension!
After you are connected to your server, the server is kept awake. You can now also start other computers or make them save energy.
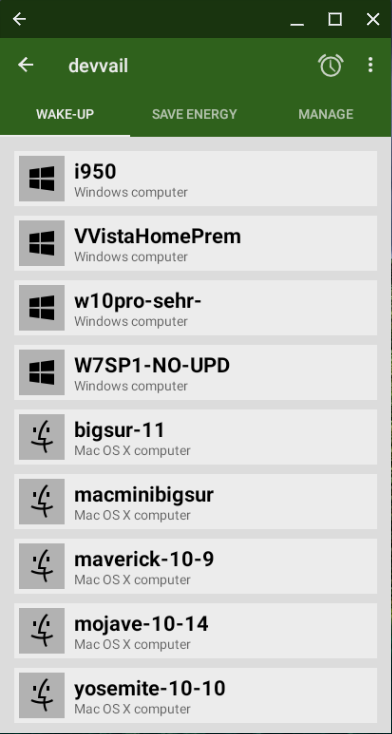
As soon as you return to the start screen in the app, the server is no longer kept awake.
Request 3 – Manage the server or NAS
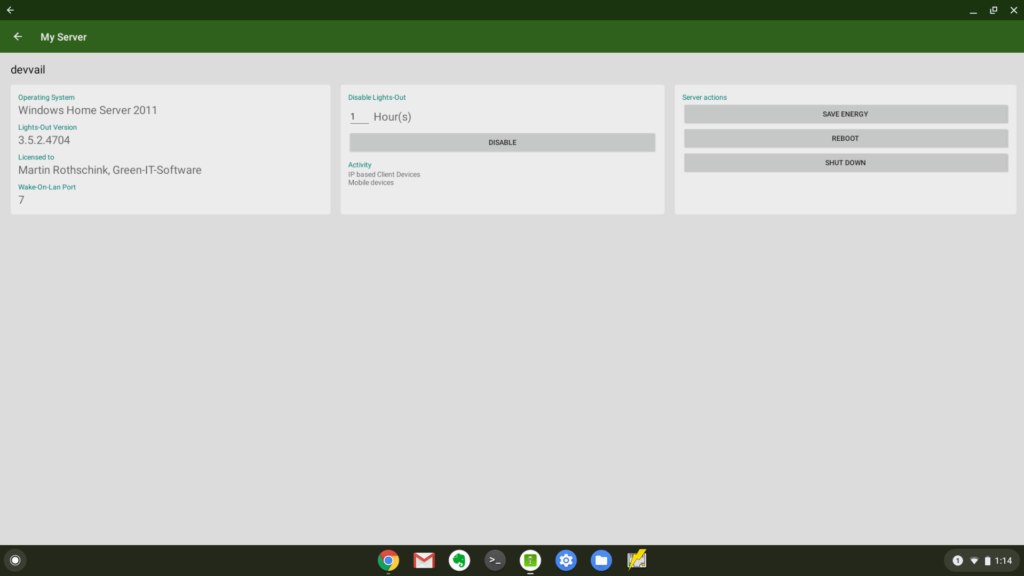
This request can also be fulfilled via the app. Under “My Server” the server can be restarted or shut down or remain active for a fixed number of hours.
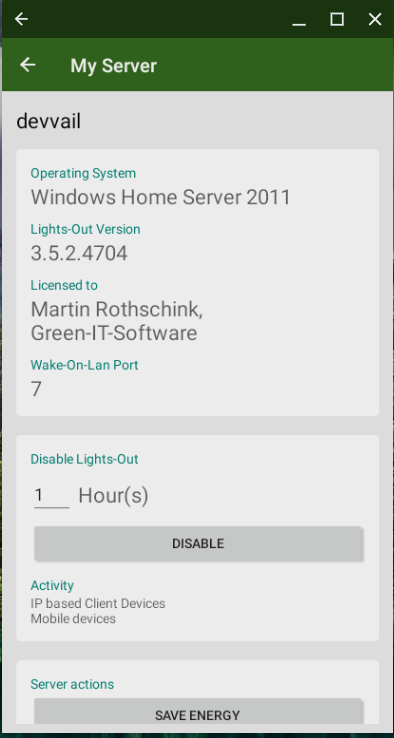
For this task it can be useful to run the app in full screen:
Summary
In this article you have learned how to use your Chromebook optimally with Lights-Out together with your server or NAS. We worked out a free solution and a second cheap one with Lights-Out Mobile.
Please use the comment function if you have questions about the use. Until then have fun with your Chromebook and Lights-Out!

